Sunday, November 24, 2013

Winter Centerpiece

I finished up my mom's winter centerpiece using Winter's Lane.  I made a smaller version of this tutorial from Sara Rose Quilts.  I used a four by four center block and sized the setting triangles own appropriately.  


I cross-hatch quilted the table topper and I think it turned out great.

Wednesday, November 13, 2013

Modern Maple Placemats Tutorial


My mini-tutorial is how to make Modern Maple place-mats using an existing pattern.  This can really be done for any 12 inch finished block.

I made 6 place-mats, 2 in each print. One fat quarter will make 2 maple leaves.  I also used 1-yard of background fabric for all 6 place-mats.  I purchased 1 yard of binding fabric and used a little more than 2/3 of a yard.  (I always buy up)

To make each leaf I used the following pattern you can down load from Lark Crafts. I made 6 maple leaf blocks. Out of the remaining background fabric, cut 12- 3.5" x 12.5".  For each place-mat sew 2 of the pieces on each side of the maple leaf.


The finished top should look like the following picture.

Now it is time to quilt and bind.  Here are the other two pictures.


I love the background fabric and the mini houndstooth for the binding.  My fall table is almost complete, I need to finish the table runner made of smaller maple blocks.


I finished my November goal way before the Thanksgiving due date!


Saturday, November 2, 2013

November Goal

My Button

Since it is Fall/Thanksgiving, I am working on place-mats for my dining room table.  I have chosen the Modern Maple block as the focal point.  I would like to have these finished this weekend so they can go on my table as soon as possible.  I also want to complete a table runner in time for Thanksgiving.


Sunday, October 20, 2013

Winter Placemats

I finished up four Winter Placemats for my mom using Winter's Lane for Moda.  I used a tutorial from Sew, Mama, Sew.


The reverse side of all the placemats is the same print.


Here they are, all ready to go to my mom and dad's house.


Sunday, October 13, 2013

Q4 Finish-A-Long

I have decided to join along the 2013 Quarter 4 Finish-A-Long to motivate me to finish all of my Holiday sewing!

she can quilt


So here is my list:

1. This little quilt needs to be quilted and bound.


2. This little quilt needs the binding hand stitched on. It has been sitting in my "to-do" laundry basket for a few months now in this state.


3. My Vintage Christmas throw needs to be sandwiched, quilted, and bound. It has been in the to-do basket for almost a year.


4. I love these placemats. They need to be quilted and bound for my mom.

5. I need to finish my placemats. These 6 pinwheels are the centers of my placemats.


6. Finally, my giant tumbler Texas quilt. I have sewn the tumblers into pairs an cut out some of the appliques.


I hope I can get most of these things knocked off my list.

Saturday, October 5, 2013

Halloween Placemat Tutorial

Over the next year, I am attempting to make placemats for each holiday and/or season.  First up I made these placemats for regular usage in my dining room. The tutorial can be found here.

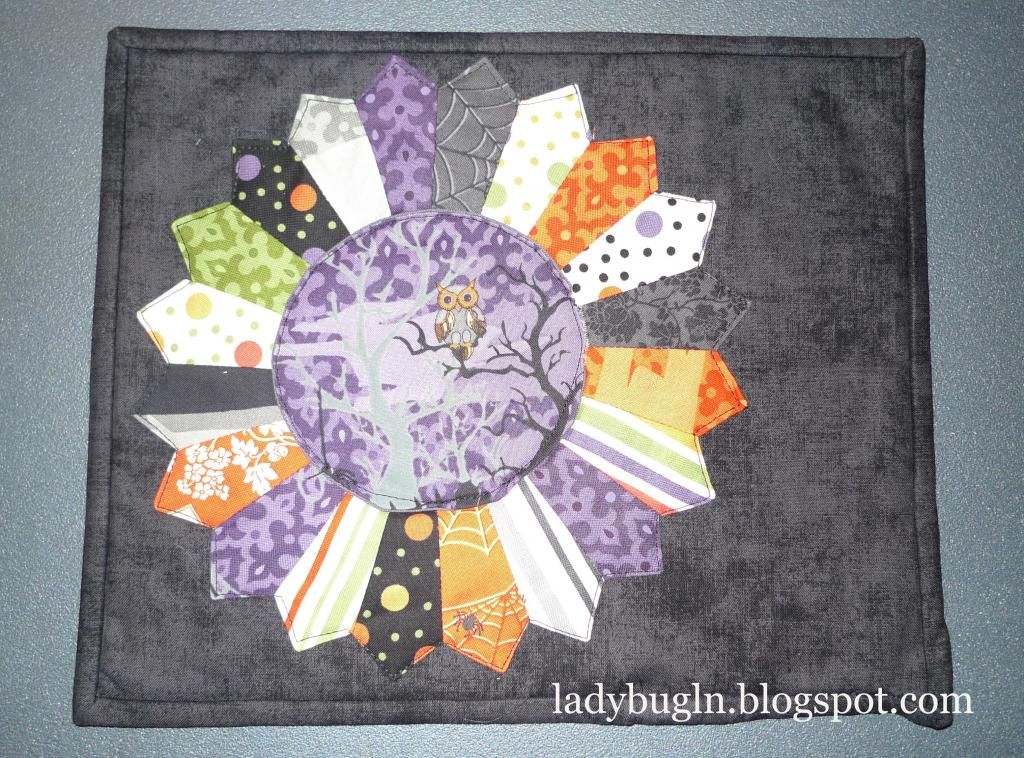
Today, I am going to share how I made my Halloween Placemats.


You will need a Jelly Roll (or a variety of 2.5 inch strips), a fat quarter for the backing of each placemat, and binding.

Cutting:

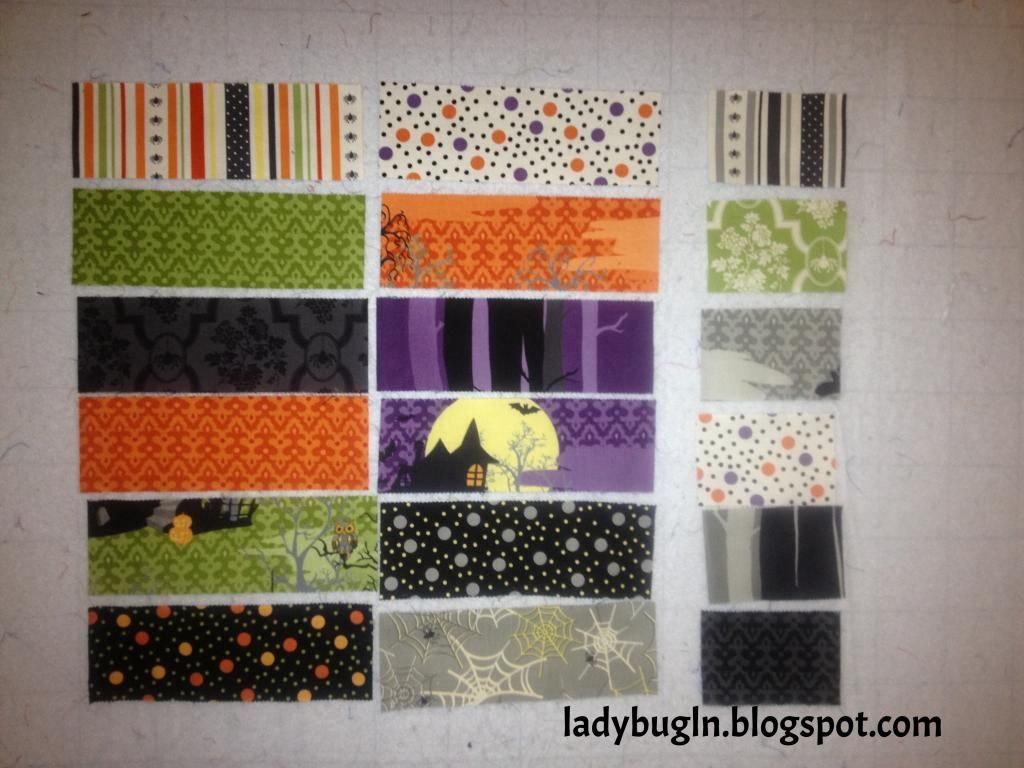
For each placemat you make, you will need 15-7.5"x2.5"strips.  Take three of the strips for each placemat and cut them in half, 3.75"x2.5".  For example, for 6 placemats I cut 90-7.5" strips.  From those 90, I cut 18 in half.

Laying it Out:

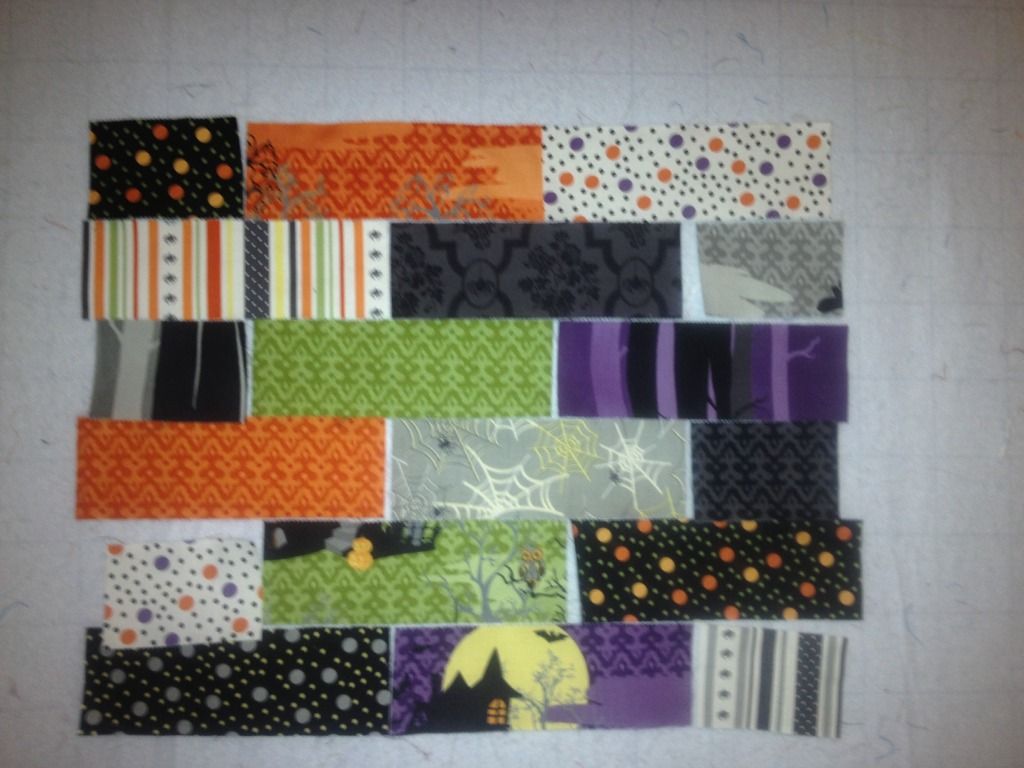
Pick out 12-7.5" strips and 6-3.75" strips and arrange them in 6 rows.


Next, arrange each row like the following picture:


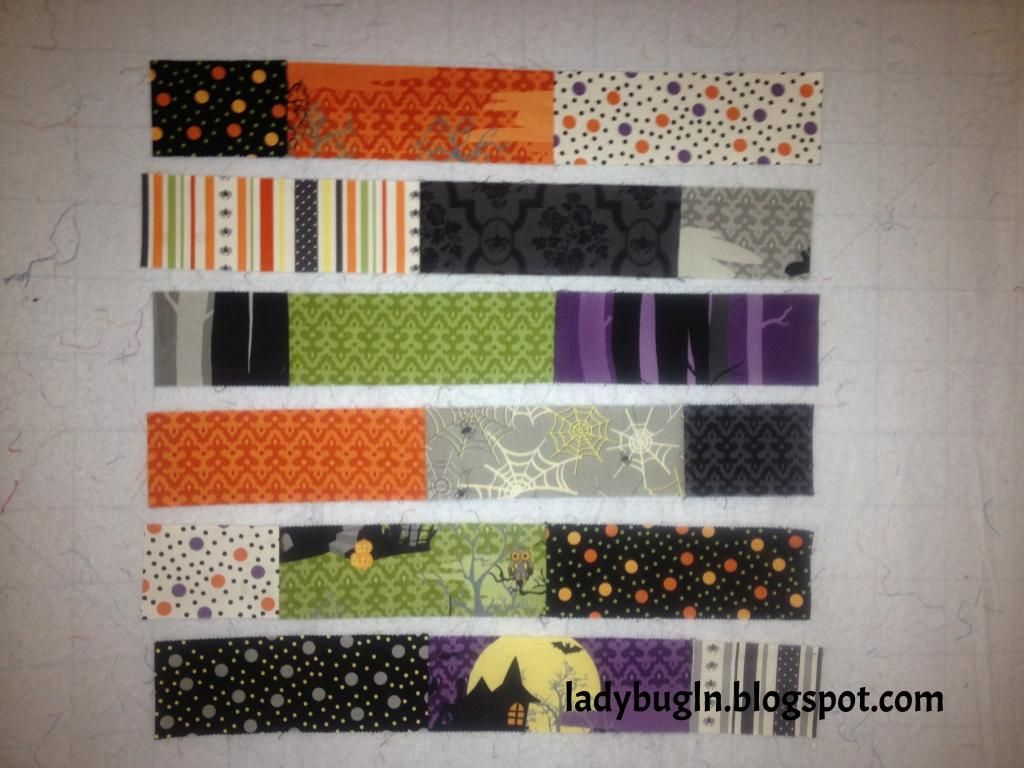
Next start sewing the pieces together.  Sew each row together (chain-piecing makes this faster).


Sew the rows together in sets of two.


Finally, sew all the rows together.


Now it is time for finishing.  Make a quilt sandwich with your choice of backing and quilt however you would like.  Then bind with a coordinating strips. 


Sunday, September 29, 2013

Halloween Dresden Mug Rug

Lindsey from Happier Than A Bird Quilts posted a cute little tutorial for a Dresden Plate Mug Rug this morning. I of course just had to try it in my Halloween scraps.  I am finishing up the binding on my place mats and table runner, but I needed something festive for my desk at work.  I think it turned out perfect.

I used Haunted Mansion by Sanae for Moda Fabrics.  I love the haunted house scenes and all of the spiders.  The little owl is my favorite and I just happened to have a little scrap for the center of the dresden plate.


The back is a dot fabric from Riley Blake.


LinkWithin

Related Posts Plugin for WordPress, Blogger...