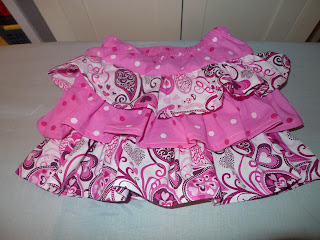
Claire's Ruffled Skirt
At first glance this looks difficult, but it is not. It is just time intensive, with a lot of different steps. I sized it to fit a 2T/3T. I made Claire's a little large so that she can wear it for awhile.
Supplies:
1/2 yard of pink dot fabric (fabric A)
2/3 yard of paisley print fabric (fabric B)
3/4 inch elastic 19-20 inches (depends on the size of your child's waist)
Coordinating thread
Safety Pins
Iron
Sewing Machine
Cutting:
Fold your fabric in half. All measurements are from the fold of the fabric.
Fabric A (pink dot)
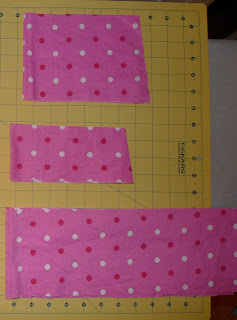
Waist (cut 2): The piece is 5" in height. The top measurement is 6.75" and the bottom measurement is 7.25".
Fold is on the left.
Middle Ruffle (cut 2): The piece is 5" in height and 13.5" in length.
All Fabric A Cuts
All pink dot cuts (fold in on the left)
Fabric B (paisley)
Top ruffle (cut 2): The piece is 4.25" in height and 12.5" in length.
Bottom ruffle (cut 2): The piece is 5.25" in height and 14.5" in length.
Bottom Stay (cut 2): The piece is 4.25" in height. The top measurement is 7" and the bottom
measurement is 7.5".
All Fabric B Cuts
The fold is on the right side.
Construction. All seams are sewn with a 5/8 inch
1. For each pair of cuts, put right sides together and sew the short seam. You are creating large loops of fabric.
2. Press open all of the seams
3. For each ruffle, fold up 0.25" and press.
4. Repeat and fold up another 0.25" and press. Then sew, creating a clean hem. Repeat for all 3 ruffle pieces.
5. On the opposite edge of the ruffle use a basting stitch and sew 0.5 inches from the edge. DO NOT backstitch. You are creating a gathering stitch for the ruffles. Repeat the gathering stitch 0.25 away from the first row. tip: Keep the tails long so you have something to pull. Repeat on all 3 ruffle pieces.
6. Middle Ruffle instructions.
a. Line up Top Stay (narrow edge down, right side of fabric up) to the Middle Ruffle (hemmed edge down, wrong side fabric out).
b. Pin right side together, lining up the seams. Repeat with the left side.
c. Start pulling the loose gathering strings until the ruffle is the same width as the stay. Be sure to distribute the ruffling evenly.
d. Sew the ruffle to the stay along the pin line. I lined up on the bottom basting stitch. e. Flip right side out and press the seam upward.
7. Repeat steps 6a through 6e with the Bottom Ruffle and Bottom Stay8. Putting the middle ruffle and bottom ruffle together.
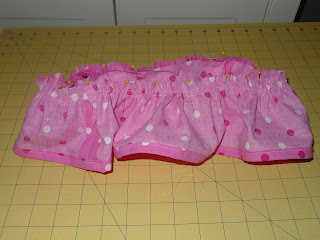
a. Turn both side inside out, like the photo.
b. Pin the middle ruffle and stay to the bottom stay, leaving the bottom ruffle free. Sew the layers together.
c. Turn inside out and press seams upward.
9. The Waist.
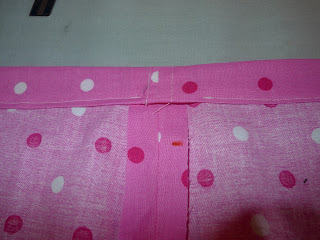
a. Turn inside out and press the seams open. Then baste the seams about 1.5" down on the top (narrow) side.
b. Press in 0.25" from the top (narrow edge). Then fold down another inch and press.
c. Sew along the bottom edge of the pressed seam and leave 1.5" open to insert the elastic later.
d. Attach the top ruffle to the bottom edge of the waist piece (using steps 6a-6e).
10. Putting it all together.
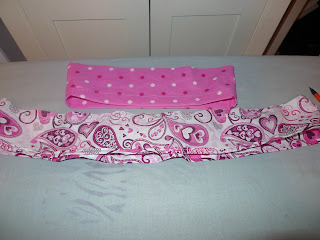
a. Flip the waist piece inside out. (The top picture is flipped wrong, it is correct in the picture below.)
b. Pin the top of the middle stay to the ruffled edge. The layers should be the top of the Middle Stay, the top of the Top Ruffle, and the bottom of the waist piece. Sew 5/8 inch in.
c. Press seams upward. Flip right side out.
11. Measure the elastic around your child's waist (or a pair of pants), add an inch and cut. Thread the elastic through the waist band. Safety pin one side of the elastic to the dress. Then pin the other safety pin to the end of the elastic. Thread the elastic through the waist band. Sew the elastic together. Making a square and then an X in the middle. Sew the opening closed, making sure the seam is pulled straight.
There you have it. It really isn't that hard, it just takes time and patience.









Lots of good reading here, many thanks! I was checking on yahoo when I found your submit, I’m going to add your feed to Google Reader, I look forward to much more from you.
ReplyDelete