Saturday, October 3, 2009

Birthday Card for Dad

My dad's birthday is coming up in a couple of weeks and I decided to make him a card this year. I made him the following card and envelope.


Paper:


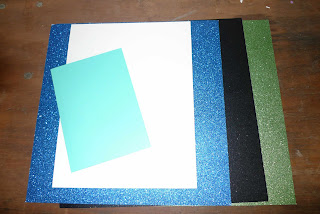
  • 12x12 striped paper for envelope
  • 12x12 argyle print paper for card
  • 12x12 cardstock in beige for card
  • printed paper for fish (I began with a yellow and switched to a print)
  • dark blue paper for lettering
  • dark brown paper for frame and accents
  • green paper for accents
*The printed paper I used was from Die Cuts With a View "Stack 6" from Joann fabric and craft store.

Cricut Cartridge: Wild Card

Supplies:
  • Xyron sticker maker
  • Glue pen
  • Glue stick
  • Bone folder
  • Scoring blade in paper cutter
Part 1:  Envelope
  • Load in striped paper.

  • Select "fit to page" button.
  • Select the shift button and then the "Father" button (refer to page 66 in the booklet).  
  • Hit "Cut." This will cut an envelope for a 4 1/2 inch card.
  • Unload paper.


  • Using the scoring blade, score the folds of the envelope so that the stripes are on the inside of the card.
  • Fold and glue the envelope.


Part 2: The Card (un-select the "fit to page" button and set the size dial to 4 1/2 inches.)
  • Base of the card:
    • Load the beige cardstock.
    • Select the "blackout" feature key.
    • Select the "father" card key.
    • Hit Cut
    • Unload machine and set aside the card base.
  • Front of card:
    • Load the argyle paper.
    • Select the "father" card key.
    • Hit Cut
    • Unload the machine and set aside the front of the card.
  • Frame and accent:
    • Load the brown paper
    • Select the "frame" feature key.
    • Select the "father" card key.
    • Hit Cut.
    • When finished cutting select the "icon" button.
    • Select the "father" card key.
    • Hit cut.
    • Unload the machine and set aside the frame and grass accent.
  • Green Accent Grass
    • Load the green paper
    • Select the "icon" button.
    • Select the "father" card key.
    • Hit cut.
    • Unload the machine and set aside the grass accent.
  • Fish (I first cut the fish in gold, but I did not like the look, so I used a green printed paper instead.)
    • I selected a green printed 12x12 paper.
    • Load the paper.
    • Move the blade using the arrows surrounding the cut button to a place where I wanted the fish to be.


    • Select the "icon" button.
    • Select the "shift" key.
    • Select the "father" card key.
    • Hit cut.
    • Unload the machine and set aside the fish.
  • Lettering "Happy Birthday"
    • Load the blue paper.
    • Change dial size to 5 inches.
    • Select the "phrase" button.
    • Select the "cupcake" card key (see page 61 in the handbook).
    • Hit "Cut"
  • Lettering "Dad" or any name.
    • Change the dial size to 1 inch
    • Select the "alphabet" feature key.
    • Select the "shift" key.
    • Select the first letter "D"
    • Select the remaining letters "ad"
    • Hit "cut"
    • Unload paper and remove the lettering.
    • So I do not misplace the lettering, I immediately load them into the Xyron sticker machine and make them into stickers.
Part 3: Card Assembly


  • Score the inside of the beige and argyle cards.
  • Using the glue stick, adhere the argyle card to the beige card base.


  • Using the glue pen, adhere the brown frame to the opening of the argyle card.
  • Using the glue pen, adhere the fish to the center of the card in the opening.


  • Using the glue pen, adhere the green grass to the inside of the card.
  • Cut the brown cattail tips of the brown grass.


  • Using the glue pen, adhere the brown cattail tips to the green grass.
  • Remove the stickers (lettering) and place on the card.


Now you have fully assembled a birthday card for a fisherman.

Monday, September 28, 2009

Wild Card Cartridge Envelope Sizes

The Wild Card cartridge is one of my favorite cartridges.  I couldn't wait to get started playing around with it.  Then I made the mistake of creating a card without an envelope first.  So then I went through each envelope to determine the max size for a 12x12 inch mat and a 12x24 inch mat. As you can see, changing the mat size can change the size of the envelope a lot or not at all. The max size indicates the size of the card that will fit in that envelope.


Sunday, September 27, 2009

Picture Frame Card


I used the following card to make a frame for a 3 1/2 x 5 picture. The frame measures 5x7 so it can be put directly into a 5x7 frame.

To make this card I used:
  • A7 size blue card (5x7 pre-made card)
  • 12x12 sheets of blue, green, and black glitter cardstock
  • 8 1/2 x 11 white cardstock
  • Xyron 1 1/2 inch sticker maker
  • Glue pen
  • Glue stick
  • Cricut Cartridges: Plantin School Book, Walk in My Garden, Alphalicious (optional)

Part 1: Making the Base Card
  1. Load the card onto the 12x12 mat in the bottom left hand corner (see picture).
  2. Load the Plantin School Book cartridge into the machine.
  3. Hit "Load Paper" to load the paper into the machine. Remember that that the card should be lined up on the bottom left hand corner.
  4. Once the paper is loaded, use the arrows around the cut button to line up for the cut. This cut will be the rectangular opening for the picture. The left/right setting should be 7 7/8 and the in/out setting should be 9 3/16.
  5. Push the "Center Point" button.
  6. Select the Rectangle. Hit shift and then the star button.
  7. The settings I used were speed on high and pressure on max. The display should look like this:
  8. Hit the "Cut" button.
  9. Unload the paper and remove your card.
  10. If you are repeating this cut multiple times, when loading in a new mat, select "load last" instead of "load paper" to bring you back to the point to begin the next cut.
Part 2: Making the Letters
  1. Select your favorite font. I used Alphalicious for this card.
  2. Load your white paper into the machine. NOTE: If you are going to make multiple cards and are using an 8 1/2 x 11 inch piece of paper, place the paper on the bottom left hand corner of the mat. Hit load paper. Use the arrows to move the blade to the top right hand corner of the paper. Select "Set Paper Size."
  3. I used the short stack feature, so I selected the "short stack" button on the left hand side of the overlay.
  4. Select your size of 1 inch. You may need to select a smaller size if the name you are spelling is longer.
  5. Enter in the name you wish to spell. Make sure you capitalize the first letter using the shift key.
  6. If making more than one, select the "Quantity" button. Then use the arrows under the display to select the number of times you want the machine to cut the name.
  7. Cut out your letters and unload the paper.
Part 3: Making the Dragonfly
  1. Load the Walk in My Garden cartridge.
  2. Set the size dial to 1 1/2 inches.
  3. Base of the dragonfly: Load the white paper. Select the "shadow" feature button. Then select the dragonfly button. Cut.
  4. Load in the blue glitter paper. Make sure none of the feature buttons are selected. Then select the dragonfly button. Cut.
  5. Load in the black glitter paper. Make sure none of the feature buttons are selected. Then select the "shift" button and then the dragonfly button. Cut.
  6. Repeat step 5 with the green glitter paper.
  7. Now you should have a white base, a blue base, black and green layer pieces.
  8. Use the Xyron machine to make the blue base, the black body, and green wing/stripe pieces into stickers. If you do not have a Xyron, you can glue the pieces together.
  9. Assemble the dragonfly.
Step 4: Assemble the Card
  1. Use the Xyron machine to make the letters into stickers. Place the name onto the card below the cutout for the picture.
  2. Open up the card and apply glue to the entire inside of the card. Place the picture so that it can be seen through the opening. You have some time to adjust, so close the card and adjust the picture. You want to completely glue the card together at this point.
  3. Apply glue to the assembled dragonfly and place on the frame.
You are all finished. I hope the instructions are easy to follow. If you have any questions leave a comment and I will answer.


LinkWithin

Related Posts Plugin for WordPress, Blogger...