 To make this card I used:
- A7 size blue card (5x7 pre-made card)
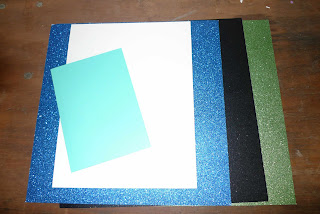
- 12x12 sheets of blue, green, and black glitter cardstock
- 8 1/2 x 11 white cardstock
- Xyron 1 1/2 inch sticker maker
- Glue pen
- Glue stick
- Cricut Cartridges: Plantin School Book, Walk in My Garden, Alphalicious (optional)
Part 1: Making the Base Card
- Load the card onto the 12x12 mat in the bottom left hand corner (see picture).

- Load the Plantin School Book cartridge into the machine.
- Hit "Load Paper" to load the paper into the machine. Remember that that the card should be lined up on the bottom left hand corner.
- Once the paper is loaded, use the arrows around the cut button to line up for the cut. This cut will be the rectangular opening for the picture. The left/right setting should be 7 7/8 and the in/out setting should be 9 3/16.
- Push the "Center Point" button.
- Select the Rectangle. Hit shift and then the star button.
- The settings I used were speed on high and pressure on max. The display should look like this:
 Hit the "Cut" button.
- Unload the paper and remove your card.
- If you are repeating this cut multiple times, when loading in a new mat, select "load last" instead of "load paper" to bring you back to the point to begin the next cut.

Part 2: Making the Letters
- Select your favorite font. I used Alphalicious for this card.
- Load your white paper into the machine. NOTE: If you are going to make multiple cards and are using an 8 1/2 x 11 inch piece of paper, place the paper on the bottom left hand corner of the mat. Hit load paper. Use the arrows to move the blade to the top right hand corner of the paper. Select "Set Paper Size."
- I used the short stack feature, so I selected the "short stack" button on the left hand side of the overlay.
- Select your size of 1 inch. You may need to select a smaller size if the name you are spelling is longer.
- Enter in the name you wish to spell. Make sure you capitalize the first letter using the shift key.
- If making more than one, select the "Quantity" button. Then use the arrows under the display to select the number of times you want the machine to cut the name.
- Cut out your letters and unload the paper.
Part 3: Making the Dragonfly
- Load the Walk in My Garden cartridge.
- Set the size dial to 1 1/2 inches.
- Base of the dragonfly: Load the white paper. Select the "shadow" feature button. Then select the dragonfly button. Cut.
- Load in the blue glitter paper. Make sure none of the feature buttons are selected. Then select the dragonfly button. Cut.
- Load in the black glitter paper. Make sure none of the feature buttons are selected. Then select the "shift" button and then the dragonfly button. Cut.
- Repeat step 5 with the green glitter paper.
- Now you should have a white base, a blue base, black and green layer pieces.
- Use the Xyron machine to make the blue base, the black body, and green wing/stripe pieces into stickers. If you do not have a Xyron, you can glue the pieces together.
- Assemble the dragonfly.
 Step 4: Assemble the Card
- Use the Xyron machine to make the letters into stickers. Place the name onto the card below the cutout for the picture.
- Open up the card and apply glue to the entire inside of the card. Place the picture so that it can be seen through the opening. You have some time to adjust, so close the card and adjust the picture. You want to completely glue the card together at this point.
- Apply glue to the assembled dragonfly and place on the frame.
You are all finished. I hope the instructions are easy to follow. If you have any questions leave a comment and I will answer.
No comments:
Post a Comment
Thank you so much for commenting!