Monday, January 31, 2011

Heart Felt Bracelets

Nothing too exciting today.  I have been meaning to finish up some heart bracelets for my shop and Claire.  Check out my bracelets and more to come at my Etsy shop (links on the right)


Now on to figuring out what I am going to do next.

skiptomylou.org/" >
 

Sunday, January 30, 2011

Another Blog Giveaway!!

Here is link to Mommy of 1 and Counting for a Mouse House Creations' Car Seat poncho. I love the ponchos and have considered making my own, but getting one would be awesome.

http://heatherandavery.blogspot.com/2011/01/mouse-house-creations-review-giveaway.html

Also check out Mouse House Creations on Etsy.  I love her shop! http://www.etsy.com/shop/MouseHouseCreations?page=1

Have fun and win a poncho!

Ladybug Backpack


I love the Sew, Mama, Sew! Blog. I have found many great tutorials on the site and I wanted to post my own version of the drawstring backpack.

Here is the link to the tutorial.  I love it because it is super easy and is so customizable. Backpack Tutorial

I followed the instructions as they were, the only thing i changed was the flap.  The top flap was supposed to be a 7 inch square.  I used a Fiesta cereal/soup bowl to make a 7 inch circle.  I appliqued the eyes and the mouth onto the circle before construction.  For the whites of the eyes, I traced a larger thread spool and for the black I traced a small thread spool.


 For the inside, I created two pockets.  One was a small ID pocket and an elastic pocket for sippy cups.


I hope you all enjoy and take time to adjust tutorials to express your creativity. 

Monday, January 24, 2011

Ruffled Skirt Tutorial

Claire's Ruffled Skirt

At first glance this looks difficult, but it is not.  It is just time intensive, with a lot of different steps.  I sized it to fit a 2T/3T.  I made Claire's a little large so that she can wear it for awhile.


Supplies:

1/2 yard of pink dot fabric (fabric A)
2/3 yard of paisley print fabric (fabric B)
3/4 inch elastic 19-20 inches (depends on the size of your child's waist)
Coordinating thread
Safety Pins
Iron
Sewing Machine

Cutting:

Fold your fabric in half.  All measurements are from the fold of the fabric.

Fabric A (pink dot)
Waist (cut 2): The piece is 5" in height. The top measurement is 6.75" and the bottom measurement is 7.25".
 Fold is on the left.

Top Stay (cut 2): The piece is 3.25" in height. The top measurement is 6.75" and the bottom measurement is 7.25".

Middle Ruffle (cut 2):  The piece is 5" in height and 13.5" in length.
All Fabric A Cuts
All pink dot cuts (fold in on the left)

Fabric B (paisley)

Top ruffle (cut 2): The piece is 4.25" in height and 12.5" in length.

Bottom ruffle (cut 2): The piece is 5.25" in height and 14.5" in length.

Bottom Stay (cut 2):  The piece is 4.25" in height. The top measurement is 7" and the bottom 
measurement is 7.5".
 All Fabric B Cuts
 The fold is on the right side.

Construction. All seams are sewn with a 5/8 inch

1.  For each pair of cuts, put right sides together and sew the short seam.  You are creating large loops of fabric.

2. Press open all of the seams
3.  For each ruffle, fold up 0.25" and press.
4. Repeat and fold up another 0.25" and press. Then sew, creating a clean hem. Repeat for all 3 ruffle pieces.
5. On the opposite edge of the ruffle use a basting stitch and sew 0.5 inches from the edge.  DO NOT backstitch.  You are creating a gathering stitch for the ruffles.  Repeat the gathering stitch 0.25 away from the first row. tip: Keep the tails long so you have something to pull.  Repeat on all 3 ruffle pieces.


6. Middle Ruffle instructions.
      a.  Line up Top Stay (narrow edge down, right side of fabric up) to the Middle Ruffle (hemmed      edge down, wrong side fabric out).

      b. Pin right side together, lining up the seams. Repeat with the left side.

      c.  Start pulling the loose gathering strings until the ruffle is the same width as the stay.  Be sure to distribute the ruffling evenly.
 
 
     d.  Sew the ruffle to the stay along the pin line.  I lined up on the bottom basting stitch.
     e. Flip right side out and press the seam upward.
7.  Repeat steps 6a through 6e with the Bottom Ruffle and Bottom Stay

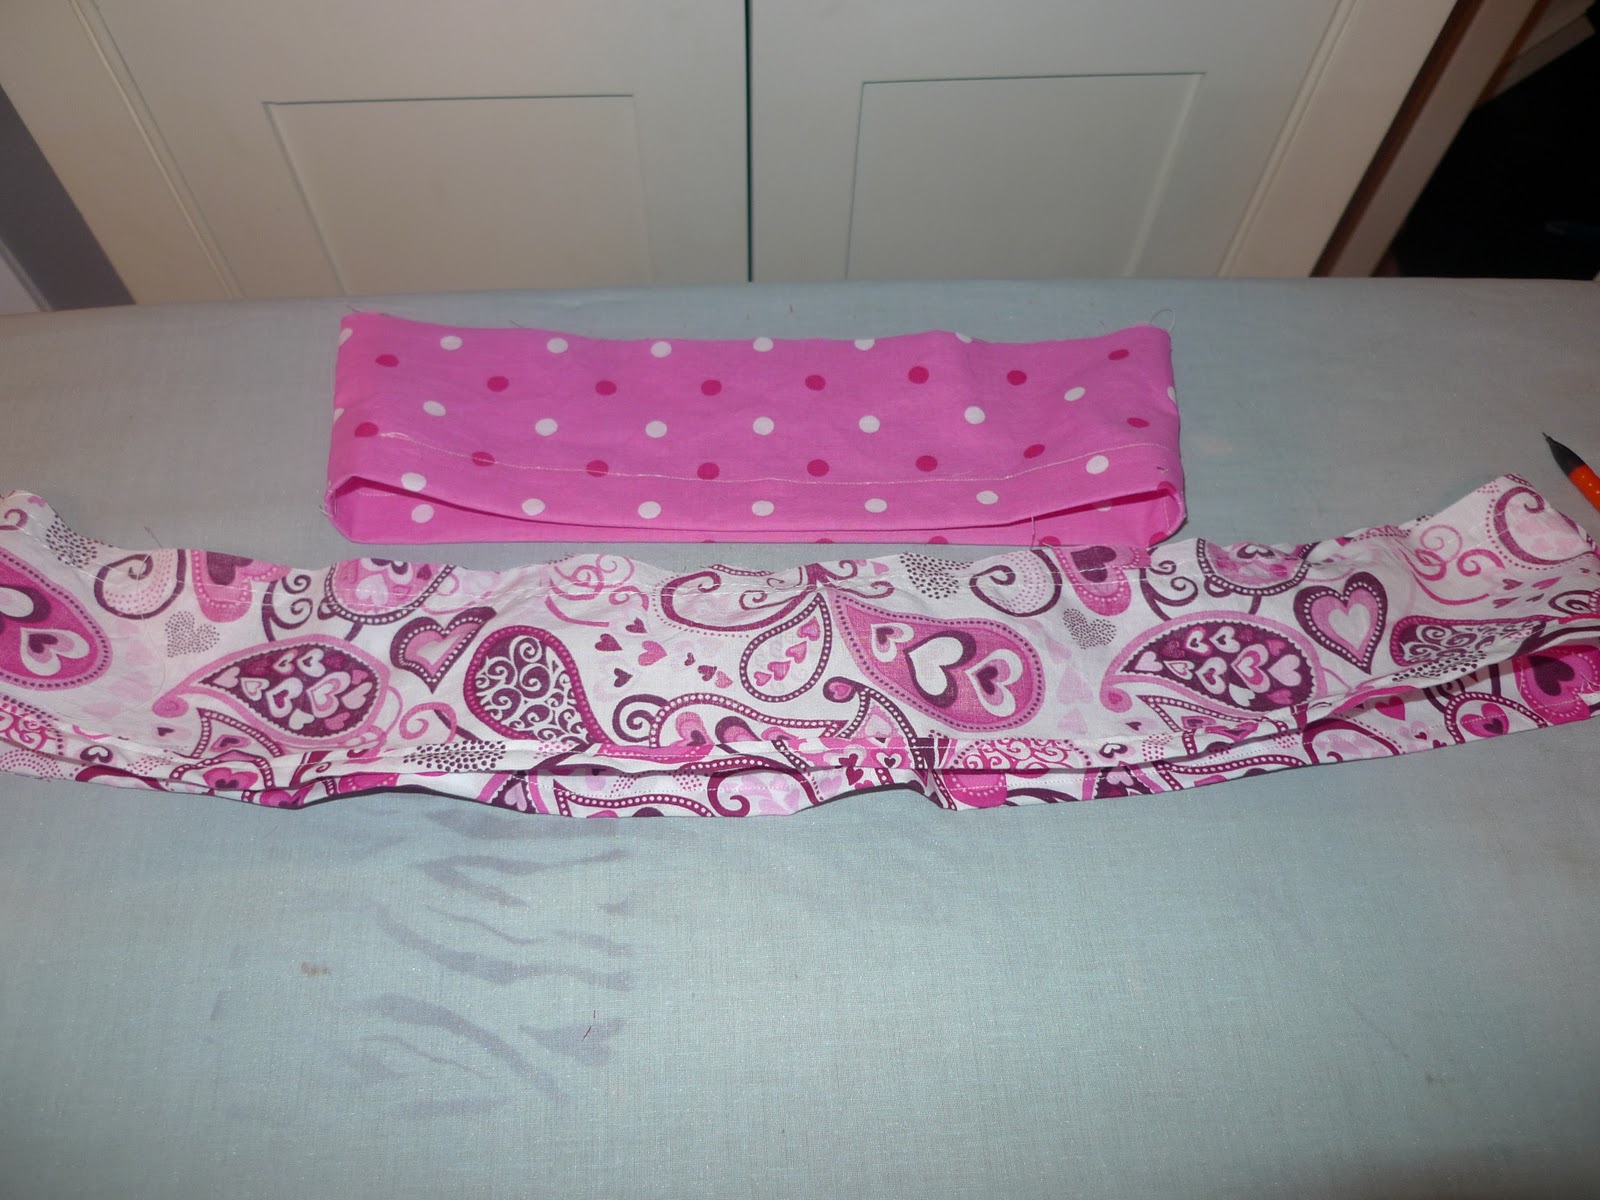
 8.  Putting the middle ruffle and bottom ruffle together.
      a.  Turn both side inside out, like the photo.
     b. Pin the middle ruffle and stay to the bottom stay, leaving the bottom ruffle free. Sew the layers together.

    c.  Turn inside out and press seams upward.

9.  The Waist.
  a.  Turn inside out and press the seams open.  Then baste the seams about 1.5" down on the top (narrow) side.
b. Press in 0.25" from the top (narrow edge). Then fold down another inch and press.

    c.  Sew along the bottom edge of the pressed seam and leave 1.5" open to insert the elastic later.
    d.   Attach the top ruffle to the bottom edge of the waist piece (using steps 6a-6e).

 10. Putting it all together.
   a.  Flip the waist piece inside out.  (The top picture is flipped wrong, it is correct in the picture below.)
   b. Pin the top of the middle stay to the ruffled edge.  The layers should be the top of the Middle Stay, the top of the Top Ruffle, and the bottom of the waist piece.  Sew 5/8 inch in. 
   c. Press seams upward.  Flip right side out.

11. Measure the elastic around your child's waist (or a pair of pants), add an inch and cut.  Thread the elastic through the waist band.  Safety pin one side of the elastic to the dress.  Then pin the other safety pin to the end of the elastic.  Thread the elastic through the waist band.  Sew the elastic together.  Making a square and then an X in the middle.  Sew the opening closed, making sure the seam is pulled straight.

There you have it.  It really isn't that hard, it just takes time and patience.


Go Packers!!

In honor of the game over the weekend, I turned an old (too big) Packers shirt into a pair of yoga pants to wear while watching the game. 


I used the following blog to help me create the pants.
http://blog.craftzine.com/archive/2009/08/how-to_t-shirt_yoga_pants_1.html

I will be wearing them for the Super Bowl in a couple of weeks.

Wednesday, January 12, 2011

First Dress

A few weeks ago Joann's was having a 99 cent pattern sale so I decided I would try my hand at dressmaking.  I bought eight toddler patterns.  They were a combination of dresses and tank/short sets.  Mostly summer outfits, but with a shirt underneath they could work for winter and spring.

I decided on a Valentine's Day dress when I found the holiday fabric on sale for $2.44 a yard at Wal-Mart.   I purchased two yards, a yard each of a paisley and polka dot.  After two nights of cutting, ironing, sewing a seam ripping I was finished.


This was a McCall's pattern M6270.   I loved how it turned out, Claire's pink boots from Grandpa matched perfectly. 

Thursday, January 6, 2011

New Blog Giveaway!

The Mouse House is a great blog I have been following since I started getting creative again.  I love her ideas along with her Etsy store. Today is extra special because there is a give away.

Check it out:
http://cometothemousehouse.blogspot.com/

Wednesday, January 5, 2011

Project for Me

I have been looking at tutorials and blogs for inspiration for a purse and clutch.  I found two really cute FREE tutorials. One from Noodlehead, a gathered clutch (http://www.noodle-head.com/2010/04/gathered-clutch-tutorial.html) and the buttercup bag from Made by Rae (http://www.made-by-rae.com/2009/02/free-buttercup-bag-sewing-pattern.html).

I found the patterns back in December, but I was just looking for some great fabric.  I wanted a nice animal print, either zebra or giraffe.


The gathered clutch was my first project.  It was my first attempt at a zipper and was a lot easier than I thought it would be.  The straight lines are not so straight, but it works.  I just need some more practice.  The tutorial was really easy to follow and the entire process took about 2 hours start to finish because Claire decided to wake up from her nap early.  Now that I know the process, it would take maybe an hour, with most of the time going to cutting.


My second project was the buttercup purse.  I used the same fabric combination as the clutch.  I made several mistakes, but in all it took about 2 hours.  The length of the first episode of The Bachelor.  The purse does some out a bit small, maybe not quite big enough for everyday life but great when it is just me out and about.

Tuesday, January 4, 2011

New Year, New Goals

This year I am going to start really blogging my crafts.  I recently purchased a sewing machine with the intent to start creating things for myself and my daughter.  My goal is to create something and blog about it at least once a week, if not more.

I will start with my Christmas project.  Santa brought Claire a pink retro kitchen and my goal was to make some food out of felt for her kitchen.  I found a pattern from Simplicity (99 cent day at Hobby Lobby) for a bag, fruits, veggies, cake, and cupcakes.  

http://www.simplicity.com/p-4464-craft.aspx

Everything at a craft store goes one sale, you just have to wait for it.  Joann's Fabrics is great for finding fabric on sale.  In December, felt was half off for almost the entire month and I only needed a third to half a yard of different colors and I still have plenty left over.  I recommend buying off the bolt instead of buying the felt sheets. 

I love the final product and Claire was so excited to play with it.  I have found that it is a good way to teach her colors and the names of food items.  Over the coming weeks and months I will be adding to her collection. 


I hope you like it, if you have any interest in purchasing some felt food, let me know and I will post my Etsy store.  I don't have many things posted yet, but I am happy to do custom orders.

Happy New Year!

LinkWithin

Related Posts Plugin for WordPress, Blogger...